Posts

Showing posts from November, 2017

DIY Card

Image
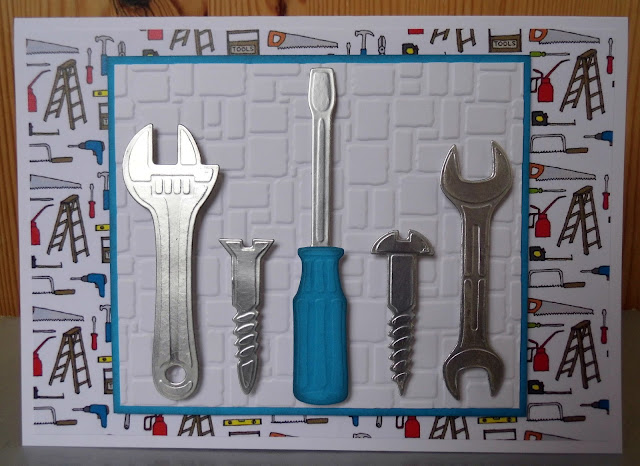
I've completed my first Design Team assignment for Hunkydory's For The Love Of Stamps! My set of cards have been collected today, and I can't wait to share my designs that I've come up with! I'll be sharing these after Sunday's launch of the stamps. Onto todays card - and it's another one perfect for the men in our lives. Quite a different style to my usual cards and a quick make too. The tools are die cut from silver mirror card and very lightly inked with black ink so the white core of the card can't be seen from the edges (very picky of me to worry about this, I know!). They were layered onto a piece of white card embossed with a brick wall pattern. This layer was matted onto blue to bring out the handle of the screwdriver, and the edges were also lightly inked. The funky backing paper is from an old issue of Papercraft Inspirations. The finished size is 5x7 inches. I hope you like it! I would like to enter this one into the following cha...

Thank You

Image
Today I'm sharing quite a different style of card to the usual as this one has some hand-sewing on it. It was great fun to make! I started with the hand-sewing element. I used metallic silver thread to create the design, which basically involves passing the needle between a set number of holes each time you create a stitch. The finished effect reminds me a bit of spirograph! I layered the purple stitched panel onto silver, then green and then onto my white 6x6 inch card blank. I embellished the design using die cut and inked flowers and leaves. A sentiment with a silver drop shadow tied the whole design together. I finished the card off with silver glitter glue and some gems. I will be entering this one into the following challenges: Creatalicious #127 anything goes with optional thanks http://creataliciouschallenges.blogspot.co.uk/2017/11/challenge-127-anything-goes-with.html Mari Ko Creations #2 thankful hearts https://marikochallenge.blogspot.co.uk/2017/11/challenge-2-t...

Gone Fishing

Image
I don't think I'm alone when I say that men's cards are (generally) the hardest to make! But I hadn't used this super cute stamp in a while so I knew it was time to create a masculine card... I started with a 6x6 inch card blank and layered up patterned papers in blue and green tones. I quite like adding a layer at a jaunty angle! The adorable image is a stamp from Crafter's Companion's Mulberry Wood range called Gone Fishing, and was coloured with Spectrum Noir alcohol pens. The grey mats are actually white card coloured with a grey Spectrum Noir pen so that everything matches perfectly! A bit of glossy accents was added to the image to bring it to life. I added my sentiment that I die cut out, inked through the die and layered it up. A few Tonic nuvo drops were the finishing touches (again!) I would like to enter this card into the following challenges: Imagine That Digistamp Creative Playground anything goes https://imaginethatdigistamp.blogspot.c...

Party Paws Notebook

Image
I'm sharing something a bit different today - a decorated notebook. I made a few of these (in different designs) as they were fun to make and quite quick too. The notebook itself is shop bought, and I sanded the front cover to take off some of the plastic coating. I embossed a piece of white Centura Pearl cardstock and inked the raised areas using spun sugar Distress Ink. I layered up different patterned papers with bright pink Centura Pearl mats onto the background. The image is the character Party Paws and is printed off a Crafter's Companion CD rom. Tonic Nuvo drops were the finishing touches to the simple design. I think I'll be giving notebooks like these as little Christmas presents this year - I like to try and give handmade goods as gifts when I can as it's quite special to give something you've put your time and effort into. I will be entering this card into the following challenges: A Bit More Time To Craft #56 Anything Goes http://abitmoretimetocr...

Blue Flowers

Image
I've had a busy weekend creating my first set of samples as part of the Hunkydory For The Love of Stamps Design Team. I've had so much fun with these gorgeous stamps and can't wait to share my samples once the stamps are released! Today I'm sharing a relatively simple stamped card in colours that I don't tend to use - sky blue and white. I started by stamping the corners from Heartfelt Creations' Berry Blossoms stamp set onto a rectangle of white card. I coloured these in using coloured pencils. I matted this layer onto a piece of blue Core'dinations cardstock and stuck this onto the white 5x7 inch card blank. I die cut an oval in white using one of Sue Wilson's double pierced ovals, and stamped the flourish stamp (from the same set) onto this. This was also coloured in using similar tones to the other flowers. I stamped my sentiment onto the same piece then matted the white oval onto a blue oval (hand cut). I lightly inked the edges of the blue ov...

Vintage Christmas

Image
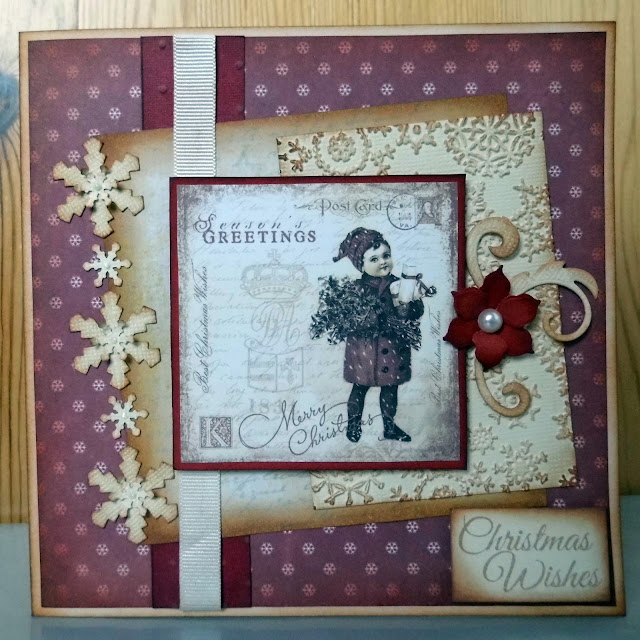
Back to more traditional colours for this Christmas card. I do like to use red on my Christmas cards, and cream is the perfect accompaniment for a vintage feel. I started with a 6"x6" white card blank and inked the edges using vintage photo distress ink. I layered up the card using different patterned papers, ribbon and embossed panels. I inked the edges of the different panels to tie the card together. The topper is from a Crafter's Companion CD Rom - I just love the vintage feel to the image. I matted it onto some red to make it really pop. I embellished the card with punched snowflakes and a die cut poinsettia. A sentiment and a few pearls were the finishing touches. I would like to enter this card into the following challenges: Crafty Creations Challenges #354 anything goes http://craftycreationschallenges.blogspot.co.uk/2017/11/354-anything-goes.html Crafty Friends #70 Christmas http://craftyfriendschallengeblog.blogspot.co.uk/2017/11/challenge-70-and...

Triple Stamping

Image
For this card I used a technique I had not used before - triple stamping. It was a really fun technique - I'll definitely be trying it out again! I used a blue memento ink to stamp the snowflakes and the reindeer onto the 3 separate panels. I tend to use black ink (boring, I know!) so it was nice to stamp in a different colour! The stamps are a set by Spellbinders that came free with a magazine. I added some shading to the reindeer image using grey alcohol markers. I glittered all of the 3 stamped panels with a white translucent glitter and also added the glitter to the reindeer's body. I'm not sure if you can tell this from the photos. I added silver glittered mats to the layers to fill in the gaps and complete the continuous pattern. Silver glitter glue accents were the finishing touches. The finished card measures 5x7 inches. I will be entering this into the following challenges: Creatalicious #126 anything goes with optional blue and silver http://crea...